REST APIs for CUBA applications
In this guide you will learn how to create REST APIs for a CUBA application. We will explore mechanisms of creating different types of APIs by allowing third-party applications to control the visit management of the Petclinic.
What we are going to build
This guide enhances the CUBA Petclinic example to allow a third party tablet application to manage visits via a secured REST API. It should be possible to retrieve information about Pets and Visits. Also, starting and finishing a treatment should be exposed through the API.
Requirements
Your development environment requires to contain the following:
-
CUBA Studio as standalone IDE or as an IntelliJ IDEA plugin
Download and unzip the source repository for this guide, or clone it using git:
Overview
Providing an API for an application is oftentimes a good way to foster machine to machine communication. CUBA supports various forms of API technologies through its strong foundation - the Spring Framework. Spring has native support for creating REST and SOAP-Webservice based APIs. Also, the wider Java ecosystem enable newer technology approaches like GraphQL.
Additionally, CUBA offers dedicated support for REST APIs via a generic API, which allows managing the complete application entity model through automatically available endpoints.
In this guide we will focus on creating multiple REST-based HTTP APIs to allow other applications interact with the CUBA Petclinic. During the examples we will work with both the generic API and custom HTTP endpoints, in order to see the differences between the approaches.
What is a REST API
Before exploring the details of the CUBA implementation for proving APIs, let’s quickly talk about what a REST API looks like and what are the concepts behind it.
A REST API is an HTTP based API (HTTP being the protocol - the underpinning of a big part of the Internet) with some specific usage of it. REST in particular has a couple of building blocks that we will use throughout this guide.
Generally speaking an API is a mechanism for letting different systems communicate with each other and exchange data. The API then is the defined interaction mechanism in which those two applications can communicate. To make it more concrete, let’s take the analogy of a restaurant:
| The menu that the restaurant offers is the API. Once you order a piece from the menu, you are doing an API call with a more or less structured interaction format ("I take number 25", "Pizza is out, sorry!", "Something to drink?"). The response of that API call is the food which is delivered from the kitchen. |
Let’s unfold the concepts which REST defines as one particular style of an API: Resources, Verbs and the request-response pattern.
Resources
A Resource is something that you can think of as an abstraction on the concept of any kind of information. A resource can be an image, a document or a dish in a menu, for example. It can also be a Pet, but not the actual Pet. It would be rather a virtual representation of it in the Petclinic application. Resources are identified by something called a Resource Identifier. In its concrete form a resource identifier is something like a URL https://petclinic.cuba-platform.com/pets/123 to identify the Resource: The pet with the Identification Number "123".
Resource Verbs
Verbs on Resources represent the "operations" that you can perform with a particular resource. In REST those Verbs should form a uniform interface, meaning that the protocol provides a limited set of standard operations. In HTTP there are a couple of Verbs that can be used in order to interact with a resource:
-
GET https://petclinic.cuba-platform.com/pets/123: fetches information about the Pet with the Identification Number 123 -
PUT https://petclinic.cuba-platform.com/pets/123: updates information about the Pet with the Identification Number 123 -
POST https://petclinic.cuba-platform.com/pets: adds a new Pet to the list of existing Pets
There are several verbs defined in HTTP that can be used. All of them have a particular meaning, although their interpretation and usage is oftentimes up to the provider of the API.
Generally the Verbs have different characteristics / guarantees associated with them. E.g. the verb GET is normally used for loading data. By the HTTP specification a GET operation is idempotent and safe. Roughly speaking, this means that the operation in the API should not have side effects. Also, applying the same operation twice should not lead to a different outcome. It is generally possible to load information about a Pet multiple times without having a side effect. Therefore, using the GET verb for this operation is matching the guarantees the GET verb offers.
On the other hand, registering a Pet twice would lead to having two Pets stored in the application. Therefore, this operation is not side-effect free. For those types of operations the POST verb would be a better fit, as this verb does not give guarantees about side-effect freeness.
There are several verbs defined in HTTP. The primary ones are GET, POST, PUT, DELETE, PATCH.
Requests and Responses
Requests and responses conceptually are not described by REST, but they are a very integral part of an HTTP based API. Requests and responses are the actual interactions that happen between the client and the server of an HTTP interaction. A request is the initial message from the client to the server. The response, on the other hand, is the resulting message from the server back to the client. Both interactions normally contain two parts: the message payload and the message metadata.
Here is an example of how an HTTP request & response interaction looks like:
POST http://petclinic.cuba-platform.com/rest/api/visits (1)
Authorization: Bearer 71dbb8a8-2a41-45e7-a73b-16a96c433651
Content-Type: application/json (2)

{ (3)
  "petIdentificationNumber": "025",
  "visitStart": "2020-04-05T08:00:00",
  "visitEnd": "2020-04-05T10:00:00",
  "type": "REGULAR_CHECKUP",
  "description": "This is a regular checkup for Pikachu"
}| 1 | the Verb + Resource identifier to express what operation should be performed |
| 2 | the Content-Type indicates how the server should interpret the message payload |
| 3 | the payload / body of the request containing the business relevant information |
After the server received the HTTP request, it would e.g. produce the following response:
HTTP/1.1 200 (1)
Content-Type: application/json

{ (2)
  "id": "4e3bde19-c0ec-7cd0-654a-577ba32dcc7f"
}| 1 | 200 indicates the response code to categorize the outcome of interaction |
| 2 | the response message (body) contains the actual business relevant information (visit identifier in this case) |
The message payload of an API interaction oftentimes uses the JSON format, as seen above. That being said, it is possible to exchange different message formats through HTTP as well, like XML, or www-url-formencoded. Also, binary formats are possible (to transfer PDF documents / images).
With this general information, we can now shift our focus on how to convert those abstract descriptions into real working APIs in a CUBA application.
How to create an HTTP Controller
In the next section, we will take a look into the concrete usage of HTTP inside a CUBA application. CUBA is based on Spring, which offers dedicated support for providing HTTP APIs. In particular, Spring MVC is responsible for offering this functionality.
In order to create an HTTP endpoint, it is necessary to create a Java class and annotate it with @RestController. To fulfil the implementation of the API operation GET https://petclinic.cuba-platform.com/pets/123, a method needs to be annotated with @GetMapping. This connects the method to a particular endpoint.
Here you can find an example of such a REST Controller in Spring MVC:
import org.springframework.http.ResponseEntity;
import org.springframework.web.bind.annotation.GetMapping;
import org.springframework.web.bind.annotation.PathVariable;
import org.springframework.web.bind.annotation.RestController;

@RestController (1)
public class FetchPetController {

    @GetMapping("/pets/{petId}") (2)
    public ResponseEntity<Pet> fetchPet(
        @PathVariable("petId") String petId (3)
    ) {

        final Optional<Pet> possiblePet = dataManager.load(Pet.class)
            .query("e.identificationNumber = ?1", petId)
            .optional();

        if (!possiblePet.isPresent()) {
            return ResponseEntity.notFound().build();
        }

        return ResponseEntity.ok( (4)
            possiblePet.get()
        );
    }
}| 1 | Registering the class as an HTTP / REST controller |
| 2 | the fetchPet method links to the endpoint GET /pets/{petId} via the @GetMapping annotation |
| 3 | the petId part of the URL is dynamic and gets passed into the method as a parameter |
| 4 | ResponseEntity takes care of returning the correct HTTP status code and HTTP response body |
For the different HTTP verbs Spring MVC provides the corresponding annotations, as we will see later in code listings.
One part of the HTTP message metadata is the response code. Those codes are used to indicate the client different outcomes of the operation. The response code 200 - OK is indicating a successful operation, whereas 404 - Not Found tells the client that the requested resource is not available. There are several response codes that can be used to precisely describe the outcome of an operation.
The ResponseEntity is responsible for controlling what HTTP response is returned to the client. But it is also used to define the response body. In the example above, a Pet object is treated as the response body. Spring MVC takes care of converting the Pet object into the JSON format and returns it to the HTTP client.
REST API for Petclinic
In this section we will look into the CUBA Petclinic application, and see how we can create REST APIs for it in order to let other applications interact with the Petclinic.
For most of the examples we will leverage the CUBA REST API add-on. In the example project it is already installed. If you use the example as a starting point for your own implementation, make sure you have the add-on in your application via the CUBA Marketplace.
All example requests for testing out the solution can be found in the requests directory in the example project. This directory contains multiple example requests to see the interaction with the API.
| When using CUBA Studio together with IntelliJ IDEA Ultimate, those request examples can be used to directly interact with the running CUBA application via the corresponding "Play" button next to the request. It allows us to interactively use the API and see the actual HTTP requests and responses. |
A new application called PetTreat will be used at the Petclinic by Vets and Nurses on their tablets. PetTreat should support the employees performing the treatments of the pets. To achieve this, the tablet application must communicate with the CUBA Petclinic application. Furthermore, the data handled in PetTreat should be updated accordingly in the CUBA Petclinic application to be accessible for all employees.
After an initial exploration of the required functionality, the following data interactions with the Petclinic were identified:
-
Search Pets by Name
-
Create a Visit for a Pet
-
See information about an existing Visit
-
Start & end a Treatment during a Visit
As these kinds of information and operations are very sensitive, it is required to only allow the corresponding Vets and Nurses to interact with the CUBA Petclinic system through PetTreat. As the information should be available immediately for all other employees at the Petclinic after it was entered in PetTreat, an API in the CUBA Petclinic will be used for interactions between the two applications.
CUBA offers solutions for these requirements through the above mentioned Spring MVC APIs and the generic REST API add-on. In this example we will look into both solutions and compare the implementation of them.
In order to support the authorization requirements, we will start with looking into CUBA OAuth2 implementation, which is a mechanism for authenticating users through the API.
CUBA OAuth2 API Authentication
OAuth2 is a common internet standard for providing an authentication mechanism for API interaction. CUBA supports the OAuth2 authentication framework out-of-the-box via its REST API add-on. The authentication via OAuth2 works the following way:
-
a client makes a request providing the login credentials (username and password) to retrieve an
access token -
the
access tokenis a short-living credential that is sent with every request as a HTTP header to authenticate further requests
An example request for performing the login and retrieve the access token looks like this:
POST http://localhost:8080/app/rest/v2/oauth/token
Authorization: Basic {{cubaRestClientId}} {{cubaRestClientSecret}}
Content-Type: application/x-www-form-urlencoded

grant_type=password&username={{username}}&password={{password}}
The parts in double curly braces like {{username}} are variables that should be replaced by the actual values. E.g. username and password need to be replaced by the actual username and password of a user to login.
|
This HTTP POST request will, if given correct credentials, respond with the following JSON containing the access token:
{
  "access_token": "56b53dab-0988-4480-84ae-5690bdf713dd",
  "token_type": "bearer",
  "refresh_token": "44727aca-07d7-4363-b545-d2801502d01b",
  "expires_in": 43199,
  "scope": "rest-api"
}
The value of the access_token fields must be stored in the client application and used for further requests. After the authentication step is done, it is possible to interact with the REST API in an authenticated way. This means that further requests, performed with this access token, act as the user who originally requested the token.
In particular, CUBA now takes the complete security subsystem into consideration, like the Roles as well as the Access Group which the user is currently associated with. For example, if the user is inside an access group, that only allows seeing Pets of the type Water, the same restriction is populated through the API.
You can find more information on the different security related topics in the add-on documentation:
The next step is to go through the functional requirements for PetTreat and see how to perform these operations through an API. We will start off with the generic API approach directly available via the REST API add-on.
REST add-on for generic API
The four requirements of looking up the data from Pets and Visits, as well as creating visits and starting a treatment, can be achieved through the generic REST API.
Before showing how it works, let’s quickly go through the idea behind the generic API from the REST API addon.
With the help of the add-on, the CUBA application provides an API for performing CRUD operations for all entities out-of-the-box. There is no need to write code on the server side to expose the entity data as an API. Also, for similar operations like creating or updating an entity, the generic API will provide this capability.
It is also possible to expose CUBA services directly via this generic API only by registering the business service in a configuration file as we will see in one of the examples.
Retrieving Visit information
For retrieving the Visit Information through the generic API, the following HTTP GET request can be performed:
GET http://localhost:8080/app/rest/v2/entities/petclinic_Visit (1)
Authorization: Bearer {{auth_token}} (2)


HTTP/1.1 200
Content-Type: application/json;charset=UTF-8

[ (3)
  {
    "_entityName": "petclinic_Visit",
    "_instanceName": "198 - Murkrow ()",
    "id": "0019e1b3-ab9a-c322-ef9b-5824fab430c2",
    "visitEnd": "2020-09-07 10:00:00.000",
    "description": "Surgery",
    "type": "RECHARGE",
    "visitStart": "2020-09-07 08:30:00.000",
    "version": 1,
    "petName": "Murkrow",
    "treatmentStatus": "DONE",
    "typeStyle": "event-green",
    "pet": {
      "_entityName": "petclinic_Pet",
      "_instanceName": "198 - Murkrow",
      "id": "e66f31a9-fa41-3e76-e881-d139439afc27",
      "version": 1,
      "name": "Murkrow",
      "identificationNumber": "198"
    }
  },
  {
    "_entityName": "petclinic_Visit",
    "_instanceName": "118 - Goldeen ()",
    "id": "001c0a58-3e2d-7d11-e93f-a16e21208378",
    "visitEnd": "2019-10-21 12:45:00.000",
    "description": "Surgery",
    "type": "REGULAR_CHECKUP",
    "visitStart": "2019-10-21 12:15:00.000",
    "version": 1,
    "petName": "Goldeen",
    "treatmentStatus": "DONE",
    "typeStyle": "event-blue",
    "pet": {
      "_entityName": "petclinic_Pet",
      "_instanceName": "118 - Goldeen",
      "id": "ebc6b61a-e6cc-8b95-4139-cc76fd408539",
      "version": 1,
      "name": "Goldeen",
      "identificationNumber": "118"
    }
  },
  {
    "_entityName": "petclinic_Visit",
    "_instanceName": "109 - Smogon ()",
    "id": "00384f37-0361-56ba-1289-89827d682ce8",
    "visitEnd": "2020-09-04 14:30:00.000",
    "description": "Fever",
    "type": "RECHARGE",
    "visitStart": "2020-09-04 13:30:00.000",
    "version": 1,
    "petName": "Smogon",
    "treatmentStatus": "DONE",
    "typeStyle": "event-green",
    "pet": {
      "_entityName": "petclinic_Pet",
      "_instanceName": "109 - Smogon",
      "id": "4100306c-49cd-0961-bfa3-c50859f1e6c4",
      "version": 1,
      "name": "Smogon",
      "identificationNumber": "109"
    }
  }
]| 1 | the URL path entities/petclinic_Visit indicates which entity data to load |
| 2 | the access token must be passed to every request in order to perform the authentication |
| 3 | the response contains a list of all Visits with its corresponding data |
Filtering for Pets by Name
The generic API also provides an endpoint to perform searches for entities. It is possible to define filter criteria similar to how you would do it in the generic Filter UI component. Filtering for the Pet with the name "Pikachu" can be done like this:
POST http://localhost:8080/app/rest/v2/entities/petclinic_Pet/search
Authorization: Bearer {{auth_token}}

{
  "filter": { (1)
    "conditions": [
      {
        "property": "name",
        "operator": "=",
        "value": "Pikachu"
      }
    ]
  },
  "view": "pet-with-owner-and-type" (2)
}


HTTP/1.1 200
Content-Type: application/json;charset=UTF-8

[ (3)
  {
    "_entityName": "petclinic_Pet",
    "_instanceName": "025 - Pikachu",
    "id": "d83cc7f7-69b5-3830-ff1d-ed74d1e4a79c",
    "owner": {
      "_entityName": "petclinic_Owner",
      "_instanceName": "Ash Ketchum",
      "id": "351eb2d2-c70b-3af7-109c-2b19a5929101",
      "lastName": "Ketchum",
      "address": "Miastreet 134",
      "city": "Alabastia",
      "telephone": "00497688166348",
      "firstName": "Ash",
      "email": "ash-ketchum@example.com"
    },
    "type": {
      "_entityName": "petclinic_PetType",
      "_instanceName": "Electric",
      "id": "d390dc26-3462-7586-221a-3110f0fcd97c",
      "name": "Electric"
    },
    "birthDate": "1998-01-03",
    "name": "Pikachu",
    "identificationNumber": "025"
  }
]| 1 | the filter definition is sent as the HTTP POST body |
| 2 | a view can be specified for defining which data is returned |
| 3 | the HTTP response contains the entry list that matches the search criteria |
With this very flexible API it is possible to perform all kinds of queries against the list of entities. More information can be found in the documentation. With those two endpoints, the API fulfils the requirements to view & search all kinds of Visit and Pet data in the PetTreat application.
Finding a Visit by its Identification Number
Another similar example is to find the Pet via its identification number. This could be also achieved by the search API, but in this case, let’s take a look at using custom service to provide this capability. The PetService that is part of the demo application has the findById(String petIdentificationNumber) method which returns a Pet instance. It is possible to expose this service directly through the generic REST API, so that the method could be invoked via the API.
For this to work, we need to register the Service method in a configuration file called rest-services.xml in the web module.
<?xml version="1.0" encoding="UTF-8"?>
<services xmlns="http://schemas.haulmont.com/cuba/rest-services-v2.xsd">

    <service name="petclinic_PetService">
        <method name="findById"> (1)
            <param name="petIdentificationNumber"/>
        </method>
    </service>

</services>| 1 | the method findById is marked as part of the generic REST API for authenticated users |
This file also must be attached to the configuration via the web-app.properties like this:
cuba.rest.servicesConfig=+com/haulmont/sample/petclinic/rest-services.xml
CUBA Studio allows automatic generation of the file and the web-app.properties binding by right clicking the "REST API" section in the CUBA menu and selecting "Create REST Services Configuration".
|
Now that the method is exposed, it is possible to interact with the method in the following way:
GET http://localhost:8080/app/rest/v2/services/petclinic_PetService/findById?petIdentificationNumber=025 (1)
Authorization: Bearer {{auth_token}}


HTTP/1.1 200
Content-Type: application/json;charset=UTF-8

{ (2)
  "_entityName": "petclinic_Pet",
  "id": "d83cc7f7-69b5-3830-ff1d-ed74d1e4a79c",
  "owner": {
    "id": "351eb2d2-c70b-3af7-109c-2b19a5929101",
    "name": "Ash Ketchum",
  },
  "type": {
    "_entityName": "petclinic_PetType",
    "_instanceName": "Electric",
    "id": "d390dc26-3462-7586-221a-3110f0fcd97c",
    "name": "Electric",
    "version": 1
  },
  "birthDate": "1998-01-03",
  "name": "Pikachu",
  "identificationNumber": "025"
}| 1 | the method invocation happens through HTTP GET and passing in the method parameters as URL parameters ?petIdentificationNumber=025 |
| 2 | the response body contains the Pet information returned as a JSON structure |
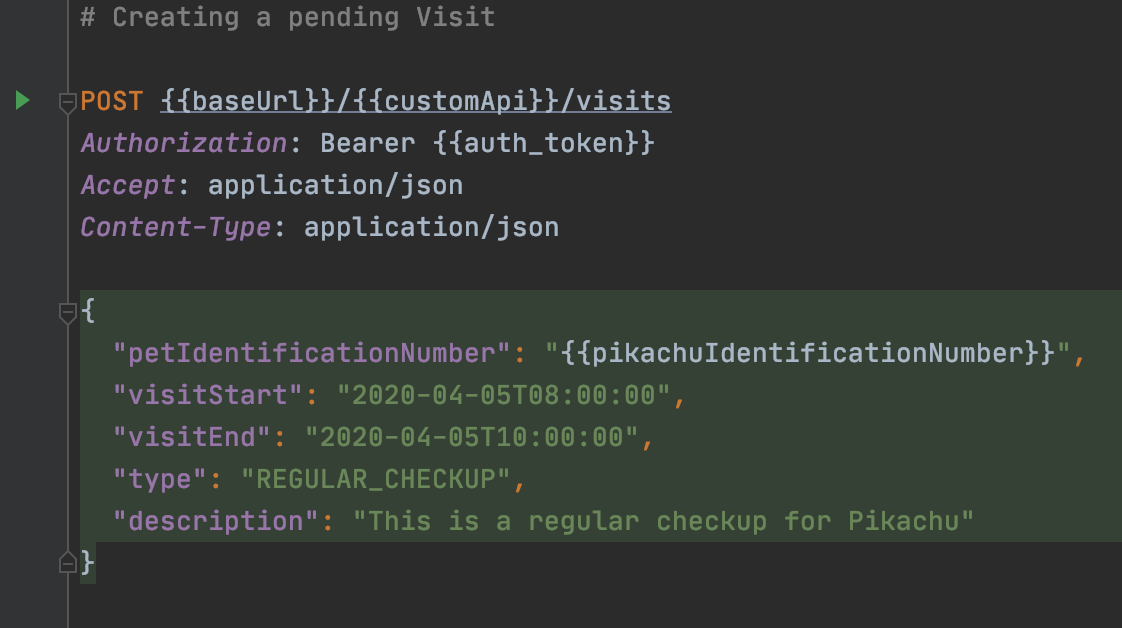
Creating a Visit for a Pet
The next operation for creating a visit can be performed through the generic Entities API as well. For creating a Visit, the following HTTP POST request must be performed:
POST http://localhost:8080/app/rest/v2/entities/petclinic_Visit
Authorization: Bearer {{auth_token}}

{ (1)
    "visitStart": "2020-10-14 08:30:00.000",
    "visitEnd": "2020-10-15 10:00:00.000",
    "description": "Surgery created via API",
    "type": "RECHARGE",
    "pet": {
      "id": "d83cc7f7-69b5-3830-ff1d-ed74d1e4a79c" (2)
    }
}


HTTP/1.1 201 (3)
Location: http://localhost:8080/petclinic/rest/v2/entities/petclinic_Visit/a1aa87cb-c68f-ef2f-a69a-a685eeb2dd0c
Content-Type: application/json;charset=UTF-8

{
  "_entityName": "petclinic_Visit",
  "id": "a1aa87cb-c68f-ef2f-a69a-a685eeb2dd0c" (4)
}| 1 | the Visit information is sent as the request body |
| 2 | links to other entities like the Pet are created by ID references |
| 3 | the HTTP response is 201 - Created for a valid request |
| 4 | the result contains an ID of the newly created Visit |
When using Bean Validation in the entities, the constraints are checked against the request. In case the invalid data is sent, the Visit will not be created, and the client will retrieve an error message with information about what went wrong.
Starting and Stopping a Visit Treatment
The last API operation that PetTreat needs is the ability to start / finish a Visit treatment. In the entity model, this operation is expressed via a status field of the Visit entity called treatmentStatus. Therefore, it is possible to perform an update of the Visit entity respectively.
The following request will start the treatment of a Visit:
PUT http://localhost:8080/app/rest/v2/entities/petclinic_Visit/{{visitId}} (1)
Authorization: Bearer {{auth_token}}

{
    "treatmentStatus": "IN_PROGRESS" (2)
}


HTTP/1.1 200| 1 | an HTTP PUT request is performed against the URL of the Visit |
| 2 | the fields to update are sent through the request body |
Finishing a treatment can be done with the same HTTP request, but instead of sending IN_PROGRESS you have to send DONE in the field value.
Custom API operations
After seeing how to leverage the generic REST API of CUBA, let’s find out how to create those APIs via custom REST controllers via Spring MVC, as shown in the beginning. Let’s go through the four scenarios and see how to tackle them one by one.
Registering custom Controllers in CUBA
The first step is to create a Spring MVC controller class and register it in the CUBA application. For registration we need to create a file called rest-dispatcher-spring.xml under com/haulmont/sample/petclinic package within the web module. It contains the configuration of the custom API:
<beans xmlns="http://www.springframework.org/schema/beans"
       xmlns:xsi="http://www.w3.org/2001/XMLSchema-instance"
       xmlns:context="http://www.springframework.org/schema/context"
      xmlns:security="http://www.springframework.org/schema/security"
       xsi:schemaLocation="
           http://www.springframework.org/schema/beans
           http://www.springframework.org/schema/beans/spring-beans-4.3.xsd
           http://www.springframework.org/schema/context
           http://www.springframework.org/schema/context/spring-context-4.3.xsd">


  <context:component-scan
    base-package="com.haulmont.sample.petclinic.web.controller" (1)
  />

  <security:http
    pattern="/rest/api/**" (2)
    create-session="stateless"
    entry-point-ref="oauthAuthenticationEntryPoint"
    xmlns="http://www.springframework.org/schema/security">
    <!-- Specify one or more protected URL patterns-->
    <intercept-url
        pattern="/rest/api/**"
        access="isAuthenticated()"
    />
    <anonymous enabled="false"/>
    <csrf disabled="true"/>
    <cors configuration-source-ref="cuba_RestCorsSource"/>
    <custom-filter ref="resourceFilter" before="PRE_AUTH_FILTER"/>
    <custom-filter ref="cuba_AnonymousAuthenticationFilter" after="PRE_AUTH_FILTER"/>
  </security:http>

</beans>| 1 | activate automatic searches for @Controller annotated classes in the controller sub-package |
| 2 | configure authentication for the route /rest/api/** and all controllers that are put under this prefix |
After creating this file, it needs to be registered within the web-app.properties like this:
cuba.restSpringContextConfig = +com/haulmont/sample/petclinic/rest-dispatcher-spring.xmlWith this configuration in place, we can create our first controller inside the controller package.
Retrieving Pet and Visit information
The first custom API that is requested by PetTreat is to load Pet and Visit Information for display purposes. For the fetchPet controller, we have already seen an example above. For the Visit fetching, the difference is that a dedicated response object is used:
@RestController(VisitController.NAME)
@RequestMapping("/api")
public class VisitController {

    // ...

    @Inject
    protected VisitService visitService;

    @GetMapping("/visits/{visitId}")
    public ResponseEntity<FetchVisitApiResponse> fetchVisit(
        @PathVariable("visitId") UUID visitId
    ) {

        final Optional<Visit> visit = Optional.ofNullable(
            visitService.fetch(visitId)
        ); (1)

        return ResponseEntity.of(
            FetchVisitApiResponse.of(visit) (2)
        );
    }

}| 1 | the Visit entity is loaded via the VisitService that loads the Visit from the database |
| 2 | the Visit is transformed into a FetchVisitApiResponse object, that is sent as the response body |
Here are two interesting points to elaborate a little further. First, the controller is very small in its functionality scope. Although it would be possible to perform the data fetching directly against the database, and potentially do data transformation also, those responsibilities are put into different classes. It’s mostly a good idea to keep the controller layer thin and only let it perform its main responsibility: doing HTTP interactions. The actual business logic is delegated to other classes.
The second thing to notice here is the dedicated FetchVisitApiResponse object. This class defines the JSON response that is transferred via HTTP to the client. It is mainly a data transfer object (DTO) that decouples the HTTP response from the entity model of the application.
public class FetchVisitApiResponse {

    private final String id;
    private final String petIdentificationNumber;

    @JsonFormat(pattern = "dd/MM/yyyy") (1)
    private final LocalDateTime visitStart;

    @JsonFormat(pattern = "dd/MM/yyyy")
    private final LocalDateTime visitEnd;

    private final ApiVisitType type; (2)
    private final String description;

    // ...

    public static Optional<FetchVisitApiResponse> of(Optional<Visit> possibleVisit) {
        return possibleVisit.map(visit -> (3)
            new FetchVisitApiResponse(
                visit.getId().toString(),
                visit.getPet().getIdentificationNumber(),
                visit.getVisitStart(),
                visit.getVisitEnd(),
                ApiVisitType.ofEntityType(visit.getType())
                    .orElse(null),
                visit.getDescription()
            )
        );
    }

    public String getPetIdentificationNumber() { (4)
        return petIdentificationNumber;
    }

    public LocalDateTime getVisitStart() {
        return visitStart;
    }

    // ...
}| 1 | Jackson annotations are used to configure the JSON output for particular fields |
| 2 | the fields might contain different types (like ApiVisitType instead of VisitType) compared to the entity layer |
| 3 | the of factory method maps the entity layer to the DTO layer and converts the attributes if needed |
| 4 | the getter methods define which attributes will be exposed via JSON |
The fundamental value proposition of this class is that you can exactly control what attributes are displayed via the API. Furthermore, due to the decoupling of the JSON response from the entity model, it is possible to adjust the structure of the entity layer while keeping the API contract intact. If you decide to rename an attribute in your database, it should not be required to let you API users also rename those fields in their integration source code.
Creating a Visit for a Pet
The next operation is to create a visit for a Pet. This endpoint also is located in the VisitController as another method:
public class VisitController {

    @Inject
    protected VisitService visitService;

    @PostMapping("/visits")
    public ResponseEntity<CreateVisitApiResponse> createUpcomingVisit(
        @RequestBody @Valid CreateVisitApiRequest createVisitApiRequest (1)
    ) {

        final Visit visit = visitService.create(
            createVisitApiRequest.toVisitCreation() (2)
        );

        return ResponseEntity.ok(
            CreateVisitApiResponse.of(visit) (3)
        );
    }
}| 1 | the CreateVisitApiRequest parameter is parsed from the JSON body of the request |
| 2 | the VisitService receives a VisitCreation object and does not directly depend on the request object |
| 3 | after the visit has been created, a CreateVisitApiResponse object is returned to the client |
In this example we have decoupled the inner workings of the Petclinic with the outside world. The dedicated API objects CreateVisitApiRequest and CreateVisitApiResponse represent the contract with the API client. Those classes are only used in the controller layer. Internally, when interacting with the VisitService, the request object is converted to another DTO called VisitCreation. This class is located in the global module of CUBA. This enforces proper layering between the REST API and the internal service layer.
The @Valid annotation on the request parameter indicates to Spring that the request object needs to be validated via bean validation. In case the JSON request contains invalid data, Spring will return a proper error response with a message of the bean validation results.
Starting and Stopping a Visit Treatment
The last business requirement is to be able to start and finish Visit treatments via PetTreat. The API is similar to the visit creation API, but it shows one interesting difference: API as a way to additional created abstractions. Up until now the API more or less mirrored the domain model of the Petclinic. Usually it is enough, but sometimes it is possible to use the API layer as a way to simplify the internal domain model or hide certain details.
Let’s look at the controller first, so that you get an idea on what kind of abstraction we are talking about:
@RestController(TreatmentController.NAME)
@RequestMapping("/api")
public class TreatmentController {

    public static final String NAME = "petclinic_TreatmentController";

    @Inject
    protected TreatmentService treatmentService;

    @PostMapping("/treatments/{visitId}")
    public ResponseEntity<Void> startTreatment(
        @PathVariable("visitId") UUID visitId
    ) {
        treatmentService.start(visitId);
        return noContent();
    }

    @PatchMapping("/treatments/{visitId}")
    public ResponseEntity<Void> finishTreatment(
        @PathVariable("visitId") UUID visitId,
        @RequestBody @Valid FinishTreatmentApiRequest request
    ) {

        if (request.isCancelled()) {
            treatmentService.cancel(visitId);
        }
        else {
            treatmentService.finish(visitId);
        }

        return noContent();
    }

    private ResponseEntity<Void> noContent() {
        return ResponseEntity.noContent().build();
    }
}
The controller provides two endpoints: "Start Treatment": POST /treatments/{visitId} and "Finish Treatment": PATCH /treatments/{visitId}. It is possible to have the same URL but provide different HTTP operations to them. Here, the reason is that for both we are actually effecting the same treatment / visit resource.
Internally the API performs changes on the Visit entity. In particular, the treatmentStatus attribute is effected. If you look back to how it is solved by using the generic API, you will see that we updated this field directly.
In this custom implementation on the API level we are not talking about Visits. Instead, by the endponit and request & response objects we are mainly creating the concept of a Treatment. Here is an example of the HTTP request to finish a treatment:
PATCH http://localhost:8080/petclinic/rest/api/treatments/{{visitId}}
Authorization: Bearer {{auth_token}}
Content-Type: application/json

{
  "outcome": "DONE"
}
In this case the API provides a higher level abstraction over CRUD operations to the domain model of the Visit. The FinishTreatmentApiRequest contains an attribute outcome which determines the outcome of the treatment: DONE or CANCELLED. This enum is not directly used by any entity, but it is rather only an API abstraction to control the different actions within the controller on what business operation to perform.
Pros & Cons of different approaches
With closing off those examples, we finished the complete Petclinic example of the REST API. With those two different approaches in mind, let’s look into their pros and cons.
Generic API
The generic REST API provided by CUBA is a huge time saver. It comes out-of-the-box with complete CRUD operations on entities. Furthermore, it implements some other extended functionality like file upload, Swagger API documentation or translation endpoints for entity attributes.
The functionality of loading entities in various ways with proper pagination, search capabilities and a mechanism to define queries in the request gives huge flexibility for the client of the API without touching the server side.
Through referencing different views, it is also possible to control the amount of the returned data within the client. In the example above, we saw where the search operation was invoked with the view pet-with-owner-and-type. Here not only the pet itself, but also the reference to the owner and its type is returned to the JSON.
With the built-in security mechanism it is possible to transparently control what data the API client is able to retrieve on the server side, just as it is possible in the UI.
By exposing service methods as an API, it is possible to expose business logic via APIs without the need to develop the HTTP interactions on the server side. This allows creating an abstraction on top of the direct entity access in order to ensure data integrity, further validation, etc.
Custom API
The custom Petclinic API is leveraging Spring MVCs mechanisms to control the HTTP interaction in very precise ways. It is possible to define the input data as well as the output data. HTTP response codes can be used to describe particular situations in the HTTP lifecycle like error scenarios.
By defining the input and output data via dedicated request and response objects, it is possible to control which data is returned. Furthermore, it allows defining higher level API abstractions on top of the entity model. Oftentimes it is a good idea not to make every database entity accessible via APIs. The decoupling allows you to free yourself from changing your internal entity model without changing your API client.
The generic API has some mechanisms in place to overcome those shortcomings. E.g. it is possible to define model-transformations to have backwards compatibility when an entity attribute is changed. But those possibilities are limited in nature compared to controlling the input & output data in java classes. Also, the possibility to invoke CUBA services directly provides a way to decouple the entity model from the API.
Developing a custom API is time-consuming, in particular when a big API surface is needed. On the other hand, it is oftentimes required in case strict API backwards compatibility is a must-have, because you do not control the API clients.
CUBA together with Spring provides mechanisms to fulfil both ends of the spectrum. Depending on the use-case and requirement either a custom API or the usage of the generic API is a better fit. It is also possible to use both approaches hand-in-hand. E.g. the search capabilities can be used via the generic API, while the write operations are performed through custom API controllers.
Summary
In this guide we have learned about the basics of the architectural style REST and its concrete application within HTTP. We went over the basics like Resources, Verbs, as well as Requests and Responses. After that we shifted our focus to take a look on how to create HTTP endpoints in Spring. The annotation driven approach via @RestController and @GetMapping classes and methods are linked to HTTP endpoints.
With that knowledge in place, we started looking into the Petclinic example on how to connect the imaginary PetTreat application to it. In CUBA there are two main options when it comes to REST APIs: using standard functionality or providing custom REST APIs via Spring. For both variants we looked into the concrete implementation of how the different requirements of PetTreat would be solved.
We finished the guide with a comparison of both approaches. As we have seen, there are pros and cons both for the generic API and a custom API. CUBA provides the flexibility to you to mix and match the approaches to come up with the best solution.